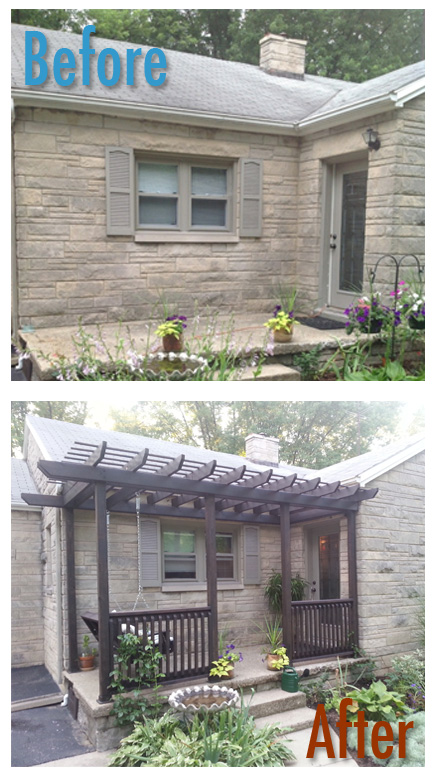
The results are in! David and I finished staining the entire project and we are incredibly happy. If you have the time, I would recommend staining each piece of wood before you put it together. The pergola has endless amounts of tight spaces and corners; it took us about two days of nonstop staining. It was well worth it! Enjoy – because we are!
DIY Railing
In my last post, I promised that I would write a follow up post about the finishing details of the pergola. Today am going to write about how to make a custom railing.
Step 1: figure out the style or pattern you want to use
You can get ideas by searching Google/Pinterest, walking around your neighborhood or local lumber store, or make up your own. At lumber stores such as Menards or Lowes, you can find prefab railings. Since our project was a custom design, we ended up designing our own based off of David’s parents, Duane and Terry, beautiful yard fencing (wish I had a photo – they are the experts).
Step 2: measure and estimate materials
We wanted roughly 8 feet of railing (4 feet on either side of the steps). It is about 3 feet to the top rail and the bottom rail is roughly 4 inches off the ground. We wanted to place the spindles 4 inches on center.
Material list:
4 – 2x4x8
2 inch screws (1lb box)
3 inch screws (1lb box)
30 – 2x2x36
Total: about $40+ dollars
Step 3: put on the top and bottom rails
Cut the 2x4x8 to length and secure both ends to 4×4 post using 3 inch screws. Screw in at a 45 degree angle. Repeat for base rail.
David and I added a second 2×4 perpendicular to each rail – this is so that the spindles have something to screw into.
Step 4: repeat on other side
Step 5: cut spindles to size and shape
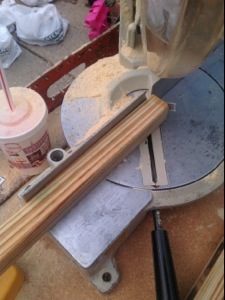
We wanted each spindle to have a 45 degree cut on both ends. You can buy spindles precut like this, but we bought the plain, square end ones because they were significantly cheaper and they would still have to be cut again to fit our custom design.
** Side note: if you can plan a project where you use standard sizes, it will greatly reduce the cost. For example instead of designing something 8 feet 7 inches, design it to be 8 feet. This way, you only have to buy an 8 foot board instead of a 10 foot board (typically boards are sold in 2 foot increments). We did not design the pergola in standard sizes because we wanted a perfect fit – cheaper does not always mean better.
Back to the project. Here is a picture of the precut spindle (we love love love our chop saw that we purchased on craigslist):
Step 6: attach spindles to frame using 2 inch screws
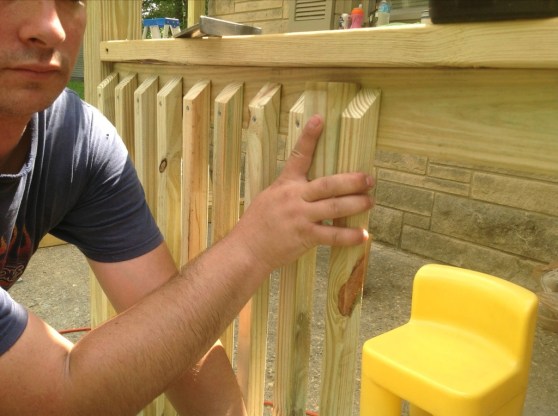
If you are an expert at math, you can do the calculations to get the group of spindles perfectly centered between the two posts. For David and I, we knew that wisteria would be growing up the railing and would hide any errors. However, we did want perfect spacing between spindles. To accomplish this, David created spacers (see picture below) to get this perfect distance between two spindle. In addition, he made sure to rest the bottom edge of the spindle on the base rail before attaching it to the frame.
Overall we only missed being perfectly spaced by roughly 1/4 inch…not bad.
Next post, I will talk about my experience building the porch swing. Stay tuned.
DIY Porch Pergola
When we first bought our home in 2009, I thought that our raised, no railing concrete slab entry porch was pretty safe and user friendly. That thought was proven incorrect by my mother. During the first month of our ownership, she came to visit and check out David and I’s new home. On her way out late in the evening, she thought she would walk off the porch, avoiding the steps, because it was a more direct route to her vehicle, saving her about three extra steps. My mom didn’t realize that the “step off” was more like a 24 inch drop. I would say her step shock is similar to the shock you have when you drink coke when and are expecting water.
Fortunately, my mom was not hurt – her car caught her upper body. Once she had regained her breath and composure, she came back to the door (I presume up the steps) to let us know what had happened. I don’t remember my exact response, but most likely I teased her about having to send her to “the home” (nursing home). After I quit laughing, I let my mom know that I would do something about it.
Three years later, we fixed the problem. It most likely would have been another five years, but I decided to make David a swing for Father’s Day and I needed a place to put it. Below, I show our steps to completing our project. This project is quite different than most I have done in regards to David and I purchasing all brand new components to complete the project.
Preparation: I think one of the best ways to start a project is to Google what you are doing and look at images of other people’s projects. David and I knew that we wanted a pergola because it has sentimental value (we used one in our wedding) and we like the look of modern Arts & Crafts styling. We panned through 100s of photos on Google images and Pinterest and was able to get a pretty good idea of what we wanted.
At the start of every project, I make a quick sketch of what I want. If you are an iPad user, I recommend the free app, Penultimate by Evernote, to sketch out ideas. This is where I figure out the connection points and write down measurements. David and I’s porch is about 7 feet deep by 13 feet long, nothing grandeur, but is decent for an entrance and has room for a swing. Pergola’s are typically either a square or rectangle box ontop of posts with a slat roof. I find that if you break a project down into simple shapes, it makes it more manageable. After you figure our the shapes, you just have to figure out how they all connect together.
What to buy (about $280-350 Can’t remember the exact amount)
- 6 – 4x4x8 treated posts
- 4- 2x6x14 treated
- 14 – 2x6x8 treated
- Lattice – At first we purchased lattice for the top, but when we put it up we did not like it and ended up returning it. Instead we purchased 1x2x8 treated lumber so that it kept true to traditional pergola styling.
- 20 unique twisted joist hangers (shown below) to attach the top pieces
- 4 standard joist hangers
- 10 bags of 3/8’x3″ (quantity 4) lag bolts to attach 14 footers to posts
- 1 bag of 20+ 3/8 washers to go with lag bolts
- 1lb box 3″ outdoor multipurpose screws (attach railing later)
- 1lb box of 1 1/4″ deck screws
- 6 post holder feet things (my name for them) they are green and we don’t have a picture, however you can see them towards the end of the post in the pictures). You drill and attach these to the concrete and then place the posts down into them for additional support.
- 4 sleeve anchor bolts to secure pergola to the house
- Silicon or other type of sealer to insulate around sleeve anchor
Tools needed:
- Saw (chop saw is easiest)
- Tape measure
- Drill
- 3/8″ drill bit
- 1″ Spade drill bit
- Mason bit for sleeve anchor (if going into stone)
- Socket wrench
- speed square
Step One: Cut decorative shape to one side of top pergola pieces.
(NOTE: we only cut one side because the other end is going directly into our house – no need for a decorative cut.)
We went with a simple 45 degree angle that started two inches down one edge – see below. You can Google pergola end design and find 100s of different types of cuts you can make. I wanted simple and attractive. The 45 degree cut is more masculine in appearance than one with more curves and cuts. I made this cut on one end of 10 – 2x6x8s and 4 – 2x6x14s.
If you make the cuts all at the same time – it will go really fast and will ensure consistency in cuts.
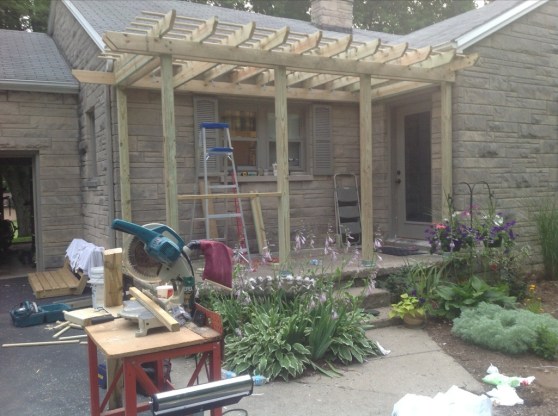
The picture below shows our setup – a chop saw on a cheap/mobile workbench with a roller stand (to the right of the red table). I love my roller stand because it is like an extra person helping me hold up the wood.
Step Two: Attach post 1 to 14 footer.
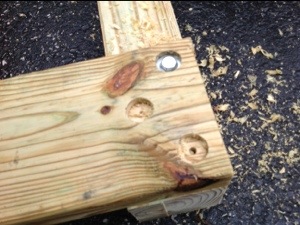
Connect uncut end of the 2x6x14 to 4×4 post (we constructed this on the ground – later David and I lift it to the porch). To do this, pre-drill into the 14 footer and 4×4. You will most likely want to countersink the lag bolts so that it is less noticeable. You do this by drilling about 1/4″ to 3/8″ with the spade 1″ drill bit. Then place the washer and screw the 3″ lag bolt into through the board and into the 4×4 post. See below.
You will see that my husband used three per board on each post – maybe a bit overkill for the small size, however better safe than sorry. He marked where he was going to drill first so that lag bolts were distributed evenly and would look nice if ever noticed.
Step Three: Connect post 1 to post 2.
Measure the length of the porch and subtract three inches (you will have a board on both ends totaling three inches – make sure to leave extra space for these boards) and use this number as a way to place the 4×4 at other end of the 14 footer. The 14 footer should extend roughly 12″ (or your desired overhang) past the 4×4. Remember to make sure that the length is from the far edge of the 4×4 to the far edge of the other 4×4. Attach the 14 footer by following step two directions.
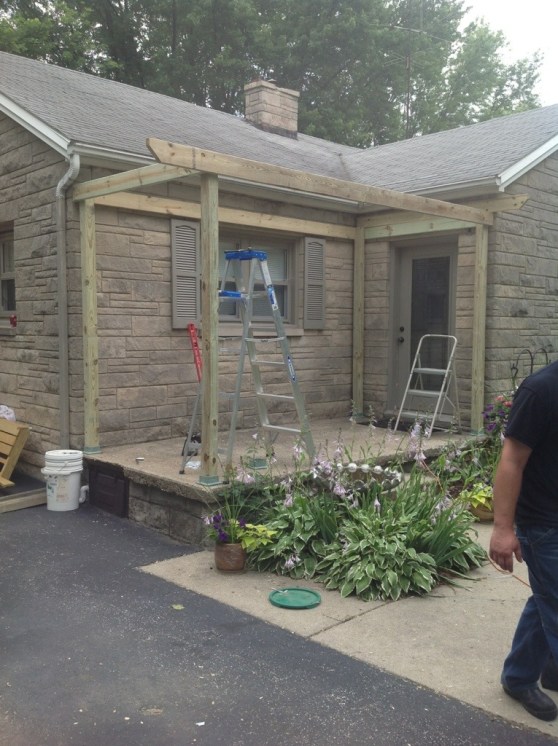
At this point it should look something like the picture below – the cut end didn’t make it into the picture, sorry. These two posts and 14 footer will be above the window on the porch (see porch picture above).
Step Four: Connect post 3 to post 2 .
To do this, we measure the depth of our porch, roughly seven feet. We took an unused board (2x6x8 treated) and cut it down to our measurement. This “connector piece” does not have decorative cuts on either end. We attached this board to be flush with the 14 footer (you can sort of see it in the picture below). Below in the picture, you will see that we moved the three connected posts onto the porch. We had to cut off the 14 footer decorative end because it ran into the guttering. We fixed the issue and I will show you later in this post.
When working on bigger projects, it is always nice to have extra hands available to move/lift stuff. For this project, I was just David and I. The neighbor who usually helps us out was not home. If you do the math, you will see that it is three posts and two people. To get it onto the porch. David lifted between the posts going over the door and I lifted the third post onto a bucket. The bucket helped relieve me of a lot of weight and allowed me to help David out.
***Step five through seven are really confusing when you write it out- in all you are creating a 1’x7′ box with 1′ overhang around four posts. The picture after step seven should sum it up – I should have made a video to explain.
Step Five: Attach post 4 to a 14 footer on the driveway.
David attached the decorative cut end of the 14 footer to the 4×4. To do this, we first measured the distance from the far edge of post 2 (including the connector piece width) to the exterior edge of post 1. Triple check this number because this is what will make your pergola square and not lopsided.
Step Six: Attach post 4 to post 3.
David and I lifted the post and 14 footer up onto the porch. While I held the 4×4 in place, David climbed up the ladder with the 14 footer to connect it to post 3. David temporarily nailed the 2x6x14 to the post so that he easily pre-drill the anchors without fear of the board moving.
Step Seven: Connect post 4 to post 1.
Measure the 2×6 connecting post 2 to post 3. Replicate this board to connect post four to post 1. (In the picture below, we set one of the top boards on to see what it might look like – we got excited).
Step Eight: Back track a little.
When we started I forgot the two of the 14 footers would be on the interior, meaning that the decorative ends have to be cut off (12″) and attached on to the frame to “fake” that the 14 footer is going the entire length of the pergola. See picture below – sort of confusing to explain. If you look at the decorative cut end by David, you will that it is actually attached to the board connecting post 1 to post 4. Basically floating there.
Step Nine: Anchor pergola to the house.
To do this we used sleeve anchors as they work nicely with stone. We didn’t think to seal around the bolts – later we got some water in the house. David drilled the holes and then inserted the sleeve anchor into the board and stone. He followed the directions on the package by tightening the bolt as much as he could.
We put two bolts above the window and two above the door. We put a lot in because we are going to be hanging a swing from the pergola and would prefer for the pergola not to move with the swing.
Step Ten: Connecting the remainder of the 14 footer to the interior side between post 3 and post 4.
Measure the distance from the outer most edges of post 3 to the outer most edge of post 4. Cut your 2x6x14 (should be roughly 12″ shorter than this due to cutting off the decorative end used in step 9). David used the three inch exterior grade screws instead of the anchors here – he felt that they were not holding up the same weight as the other boards in the project.
Step Eleven: Repeat step ten for other interior piece. See picture below – David has serious work face. ***You have to anchor to the house before this step, otherwise, you will no longer be able to access the board touching the house.
Step Twelve: Board 2 between post 2 and post 3.
To be consistent with design, we added a second interior board between post 4 and post 1. Measure the distance and make your cut. We used a U shaped joist hanger on each end to attach it to the pergola frame.
Step Thirteen: Repeat Step Twelve on Other End.
Step Fourteen: Put up any additional posts.
We added two 4×4 posts by our steps because we are going to add railings to either side of the steps to up the safety standards (for you mom). Make sure to use a level on two sides to ensure that your post is perpendicular to your pergola frame.
Step Fifteen: Place all 2x6x8 treated, decorative cut end boards on top of your frame.
We spaced ours roughly 16″ and adjusted the measure to make it fit out area. We did this dry fitting first to ensure that our numbers were correct and that it looked okay before we attached it to the pergola frame.
Step Sixteen: Attached 8 foot boards with the twisted joist hangers pictured in the supplies areas on this post.
We used a total of two hangers per board because they aren’t holding any weight and are more for decor. See picture below – it is starting to come together!!
Step Seventeen: Adding the roof.
Originally, I thought that I would want lattice to cover the top, but I did not like it. If you want significant shade, I would recommend the lattice. I wanted it to be a bit more open and more true to traditional pergola styling. I will get more shade once some of my climbing roses and wisteria mature. For this roofing style, we used 1x2x8 treated lumber. That is the longest piece we could find at Menards for 1x2s. You will notice in the picture below that we did not start the 1×2 on the edge, but rather away from the edge – I thought it looked better this way. We measured about 12 inches from the edge and made a mark. Then, we aligned the 1×2 to the mark. We made 6″ spacers out of spare wood and used them to align all the remaining 1x2s.
After step seventeen:
My next post will be about making the porch railing. I will end this post with a cute picture of Reese being a helper.
Water Main Break
Some of life’s craziest, most stressful moments happen in the middle of the night, on a weekend. We were very lucky our incident happened in the middle of the afternoon on a weekday while every store was open. I came home from work and saw this in the back of David’s truck:
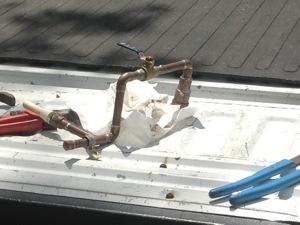
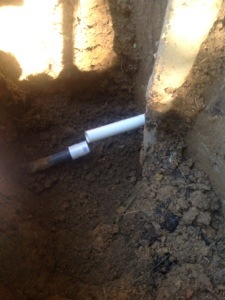
This is the main shut off valve for water that usually is housed on our basement wall. My first thought “was stay calm Cassi, David would have called if there was an emergency.” I decided to walk around to the side of the house where the water main usually entered the house underground. All I saw was a huge heap of mud with a pipe resting unconnected in the middle of the hole.
A billion thoughts ran through my head: David leaves for work in five minutes – what am I going to do, how much is this going to cost to fix, what arrangements need to be made, can we fix this ourselves? Just as my mind was trying to analyze every potential scenario, outcome, and mortgage rate, my husband came strolling around the house with a grin on his face. I tried with all my might to speak calmly and rationally. “What is going on?”
David began to tell me this story of how we needed to dig up the entire yard back to the hookup by the road because there was a break in the middle of the line. The dollar signs were spinning in my head and I was starting to become unglued. David snickered and said a quick “just kidding.” I didn’t know whether to rejoice or punch him. I think he did that to make the next part seem small in comparison.
He began the real story with “what had happened was…” David and I use that phrase as a way of lightening the mood. When I worked on campus, my students always started their excuses with this phrase and I still smile when I hear it.
David began the digging outside because there has been small amounts of water leaking into our basement from around the water main anytime it rained. He had a hunch that the seal around the pipe was destroyed. So he began to dig down with a shovel and then switched over to using a post hole digger.
His lesson to share is that when you get close to a pipe while digging, slowdown. David didn’t realize how easy it would be to break the pipe. According to his tale, he barely hit the pipe with the post hole digger and it just exploded. Always remember that things under pressure will bust, break, explode easier than items not under pressure. So what was once a minor leak now turned into a river leaving two inches of water in the basement. **As a side note, as a new home owner, we learned that we are responsible for all maintenance and costs associated with the water line from the point of hookup at the road to and into our house.
Below, I am going to show you what we did to resolve the problem. We have quite a bit of experience and tools required for plumbing however, we are not experts by any means. Always remember as the old saying goes, there is more than one way to skin a cat. So before starting any project, try to flush out all ideas, options, state codes, etc. Additionally, if working with someone else, you are a team and two heads are better than one. Typically people desire to do projects their way only and have the mentality that they are always right (this is David and I to a tee). Just a warning, but this approach can be very destructive on a marriage, so really consider this before purchasing a fixer upper. So chose your attitude and be careful on team projects, especially high pressure (no pun intended) projects because tension is naturally high.
To start off, we spent about $40 on supplies – we had all the tools necessary to complete it. I forgot to take pictures of the fittings which include the pipe to match what was left of the water main (schedule 40) and various PVC connectors (coupler and a male union).
Here are some of the products we used:
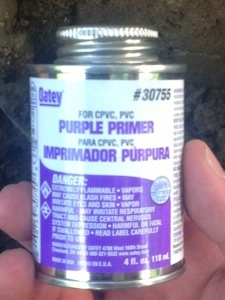
Pipe cleaner (preps the surface on PVC to make the glue stick – not optional). This stuff smells horrid and will permanently stain any surface it contacts; you can see my dryer for proof.
PVC Cement

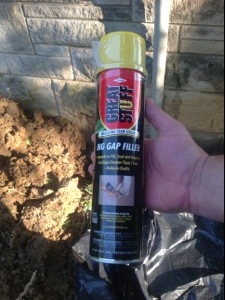
Foam to fill wall/hole. This kind is made for larger gaps.
Step 1. Remove exterior dirt from water main pipe surface- at least three inches back.
Step 2. Use PVC cleaner (purple liquid) on the inside of the coupler and the outside of the water main pipe.
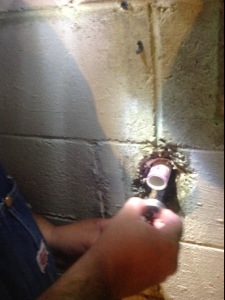
Step 3. Apply PVC cement to inside of coupler and outside of pipe – cover several inches as the coupler needs to be fitted with 50% of the water main and 50% new addition pipe. The picture shows how the water main fills 50% of the coupler. Note – only doing one side at a time. Don’t get ahead of yourself.
Step 4. Push new pipe through basement wall. Check alignment to ensure that it easily connects to water main and coupler. Ours did not meet up very easily and we had to chip a little of the wall away. We’re we shocked because there was already a major gaping hole.
Step 5. Repeat steps one through three on the new pipe addition. Check out where our daughter Reese sat through the entire process:
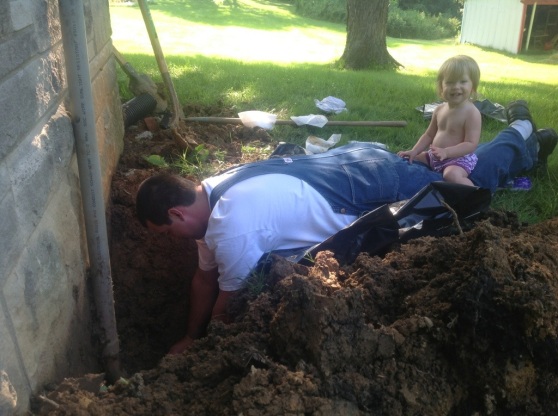
Also note that David is laying on a large black trash bag. This really helps keep you a lot cleaner. He loves wearing overalls because it has a million pockets to hold every tool possible. Now is a good time to take a drink break because:
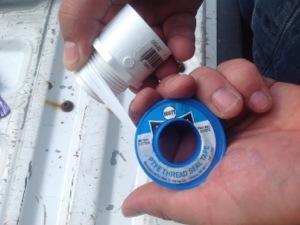
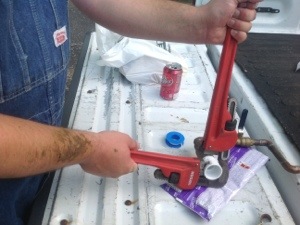
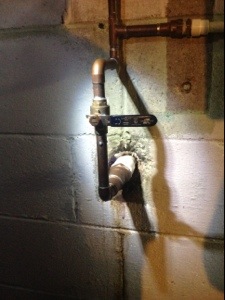
Step 6. Join male union to main water shut off valve. To do this, we used PTFE pipe seal tape around the threads of the male union. This helps the transition between the PVC and copper. The tape should be put on in such a way that when it is screwed onto the copper, the tape goes in the same direction as the screw threads. Make sure that this is tight – a lot of water pressure is behind this.
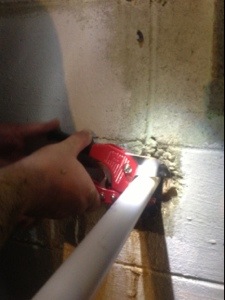
Step 7. Join water main to main water shut off valve. To do this you must first cut off the excess pipe (pipe cutter is the best plumbing tool you can own – cheap and makes a smooth cut every time). Make sure to leave about 1.5 inches beyond the wall so that it can go into the other 50% of the male union. Repeat steps one through three to clean and adhere parts together.
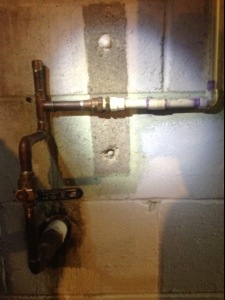
Step 8. Reconnect water shut of valve to existing plumbing. Follow steps one through three again.
When working in the basement, it is great to have a head lamp so that you aren’t fooling with a flashlight. I think we bought ours at a dollar store. My dad recommended it to us.
Step 9. Fill hole with foam and seal. At the start of the steps, I showed an item list – look at the foam used. Follow the directions on the can. Usually, you fill the hole to 1/3 and the foam does the rest. We took and extra step and used an exterior grade silicon around the edges. This was only a safety precaution.

Step 10. Carefully turn the main water back on; keeping the shut off value inside house in off position. This way you can see if there are any water coming out on the exterior of the house. Next, go inside and turn on the nearest faucet to full blast. There shouldn’t be any water coming out. The faucet helps to relieve some pressure when turning the main valve on and allows for air and dirt to escape the line. If there are no leaks, you should be good to go. All you need to do is back fill the dirt around the pipe – very carefully.
You made it!
Delayed Project
Tonight I was going to work on the next addition for the blog. I am currently working on a porch swing for David – it was his father’s day gift. In this part of the state, we had a LOT of storms and rain. Due to this, I was unable to work on the project. Hopefully tomorrow I can show you the progress. I look forward to sharing!
Bringing You Up to Speed, Part II
The part of our house that needed the most work when we moved in was the kitchen. David and I got really excited about making changes and decided to demolish the entire kitchen within the first couple of weeks living in the home, but we didn’t have a plan for completion. We didn’t think about the difficulty, time, and money needed to complete the project (our hearts were bigger than our brains).
I had just started my master’s program and the recession hit hard on my husbands work. Not only did we not have a kitchen, but we had a major mess/eye sore at the front of our home. They say that looking back is 20/20 and I would completely agree. If I had known that I would be washing dishes in a big tub on my back porch in rubber tubs and that our makeshift countertops would be old doors on sawhorses, I would have been a little more strategic. To give you a time frame, it was almost two years before I put the sink back into the kitchen and another six months for water.
During the demolition:
Here the wall is finally patched (I couldn’t believe how well Kilz paint covered ugly and stank):
The next part of the process, often the most expensive, was the cabinets. I had just about every cabinet magazine in existence. There are certain areas of my life where I will admit that I am snobby in my purchases – purses, jewelry, and jackets to name a few. I wanted my cabinets to be added to this list. My mom, if writing alongside would point out my wine taste and beer budget dilemma.
Reality finally kicked back in. It would be RIDICULOUS to put more than $5-10,000 into cabinets for our housing market as I would ever be able to gain the money back. My only argument for paying more would be if I was a professional chef and/or this would be my lifelong home until I go onto my home in heaven. Since neither one fit the bill, I couldn’t logically justify the spending spree.
A solution to my situation came through a call from my oldest sister Lindsay. She let me know that the house they had been renting from the library was going to be torn down for a parking lot. It was perfect timing for her because they had just bought their first home and this was the jackpot for me, a parking lot doesn’t need cabinets. Lindsay arranged a purchase of the cabinets within the home from the library. I was on cloud nine. Her kitchen was similar in size to mine and they were older, but high quality cabinets. The even better news was the price, $400 for the entire set of kitchen cabinets. Yes, go back and read it again. Between you and me, I would have paid $1000+.
David and I travelled three and a half hours to get the cabinets with a trailer borrowed from a family friend. There was a miscommunication in the business transaction with the cabinets because it was my understanding that the cabinets were going to be removed from the home. Needless to say that we did not bring any tools whatsoever and when we arrived they were still attached to the wall.
I can’t STRESS enough how awesome it is to have a supportive family. Lindsay, David (Lindsay’s husband), David (my husband) and I removed all of the cabinets with hand screw drivers. There was not power in the home and we didn’t have any cordless tools. I might also mention that it was about 90 degrees in the house. I will say that I don’t remember any complaints from our family helpers. In my book of rules, this is one place you could be given a free complaint pass.
We made it home with the cabinets in one piece and without setting the library rental on fire. Below you will see the upcycled kitchen cabinets. We painted the cabinets white to make them look newer, added crown molding to make them look more custom, and painted all the pulls to be consistent with all the oil rubbed finishing in the rest of the house.
Custom refrigerator cabinet:
Middle of process. Added pre made countertops. Tips for that will come later:
My father did the flooring and it completely changed the feel of the home:
Now, what you have been waiting for……the almost finished version. We have many little projects left that you get to enjoy later on.

Notice the missing drawer pulls…like I said…more to do…
Enjoy…more to come this week.
Bringing you up to speed
Before I get going into new projects that show you step by step instructions, I thought I might show you a few completed projects. When you look at these, you need to remember that these were completed over a significant amount of time (having time to do it and having the money to complete it). I will show some before and afters (if I can find the old original photos).
Today, I will show you a little bit of the living room transformation.
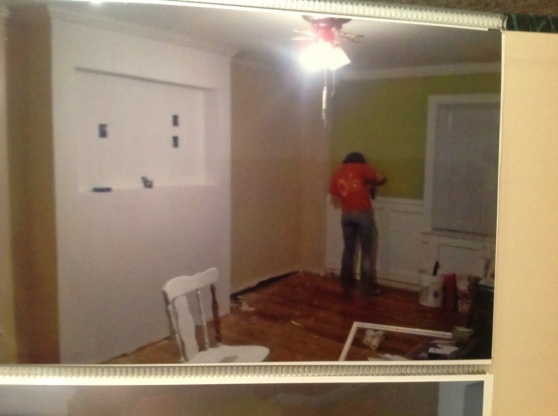
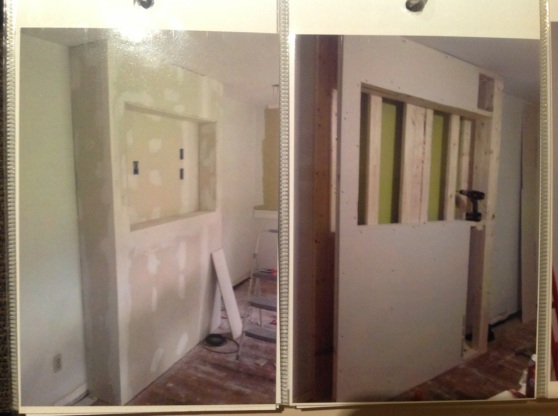
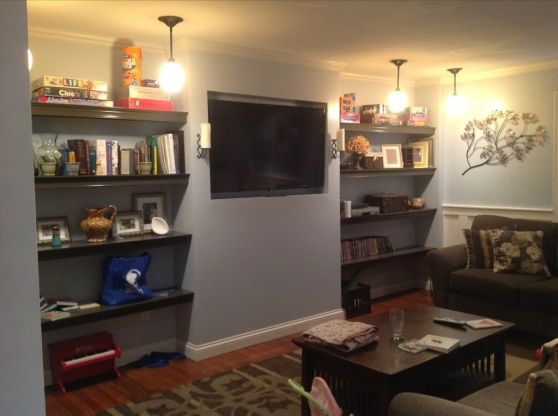
Entertainment Wall – we wanted to get a flat screen TV, but we didn’t like the look of it just hanging off the wall. We have another major issue with storage space. We felt that the solution below created a win-win situation, a recessed area for the TV and floating shelves to each side for storage. This project was relatively inexpensive because it was mainly drywall stuff and framing materials.
The shelves were made out out of 1x2s covered with a cheaper grade 1×12 (we did cheaper because we knew we were going to paint them a deep brown). We covered the front with an MDF, narrow door casing style trim and put a thin piece of cove to match our wainscoting in the rest of the room. Super cheap and super easy.
Before:
During:
After: (I didn’t take pictures during the making of shelves. No worries though because we will be doing a similar project in the bathroom.
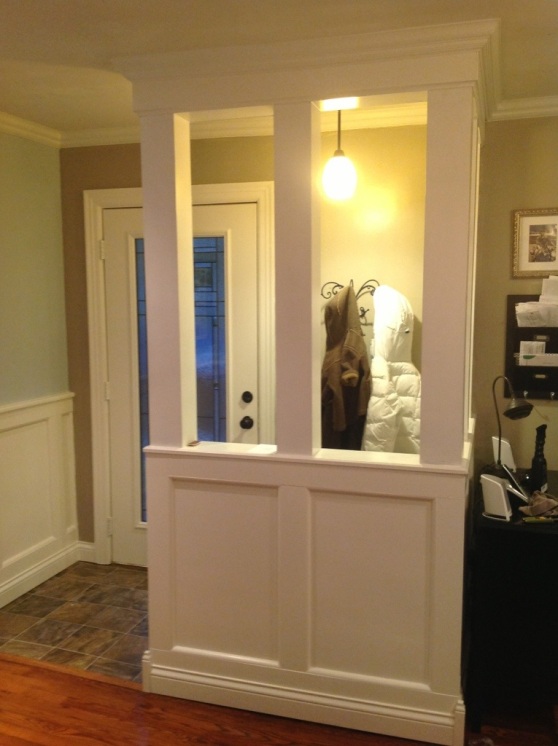
Entryway (in living room):
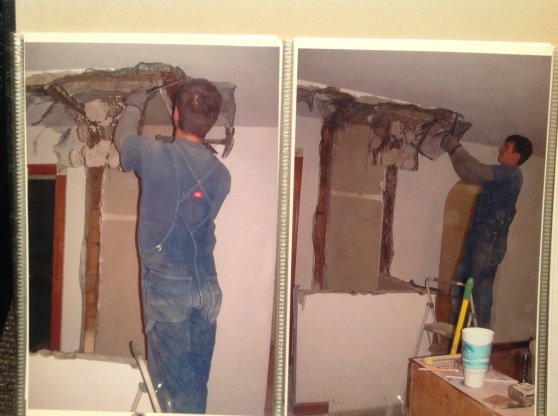
Before – we had a random closet somewhat blocking the main entrance into our home. David and I got the bright idea to take it out completely. It was our first experience with plaster – a very daunting experience. After removing half of the old wall, we found out why the closet was there. The builder of the home had cut the bottom of the roof truss about three feet short of the exterior wall. The closet was there to provide support. We found that this is what caused the dip in our floor. When they put the closet in to support the weight and pressure, they did not put a support in the basement which caused the floor to warp with time. We have since added the jack and have been slowly raising the floor back up. Lessons learned – prepare for the worst and have extra cash just in case, your timeline can’t catch all things so double it, and that problems can arise and you can always chose your attitude in response.
The project below shows how we made due to keep the support and have a slightly better entry.
Before:
After:
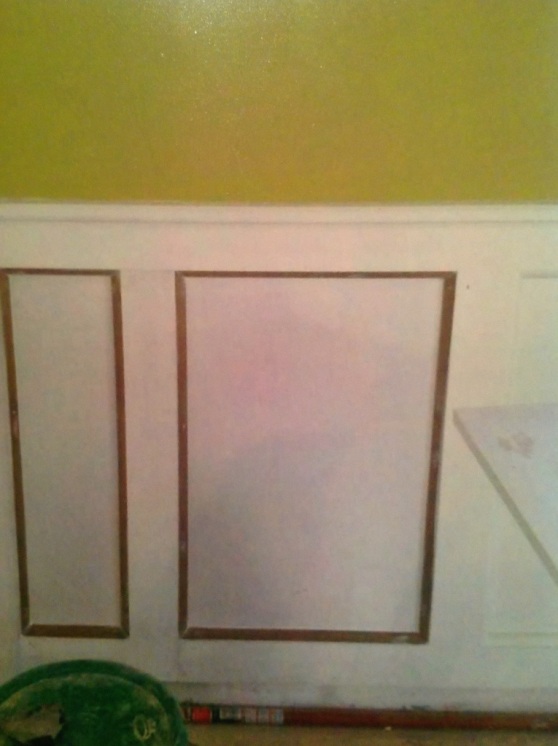
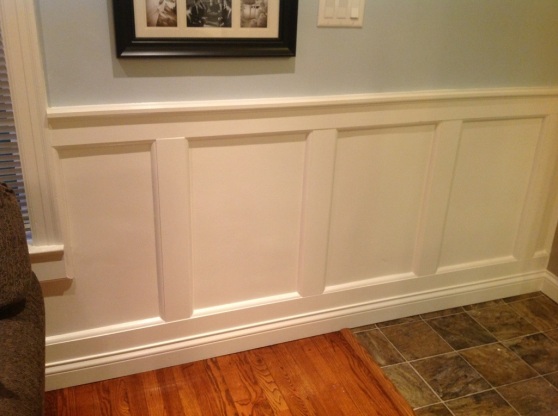
Wainscoting – we wanted to dress up our walls a bit in the living room so we added wainscoting on two walls. We were able to upcycle most of it by using an old ugly shelf that was left by the previous owner. We used quarter round on the inside which was also upcycled from when we took it off the floor before we sanded the hardwood. This project wasn’t too difficult – we just had to make decisions on whether we wanted to stay square on application or adjust to make it look square and not show off more of the homes irregularities.
Before:
After:
Tomorrow I will share the kitchen project – oh what a project!
Welcome
Welcome to my blog. Let me introduce myself; I am Cassi. I work full time at a college campus doing career advising. I always stress to my students that your interests can exist and be fulfilled in your personal life – and that is exactly what I do. My husband, David, and I spend a lot of time giving our house a second chance. We purchased a 1950’s bungalow style home that needed more than a little DIY. I am now able to put my art degree and past experiences to work. In this blog, I will share with you my process and experience – hopefully giving you wisdom that I had to learn along the way.
We started in January of 2010, so I will try to bring you up to speed as quickly as possible. I owe much of our progress in our home to my dad, Lonnie. I tagged along with him to work since I was in kindergarten. My skills progressed as I designed my parents pool deck and recently re-drywalled our upstairs living space (A-Frame). The second person I owe it to is my mom. She would call me two seconds after reading the welcome if she was not mentioned. My mom has always been my cheerleader, telling me that I had a unique and special talent.
On the mention of talent, I have to say that a lot of my projects are inspired by other peoples projects. I typically find and idea and run with it. That is why you will often hear me refer to myself as an imitator, not a creator.
Lastly, I can’t take all the credit for each completed project. My husband David has amazing skills in everything DIY, construction, etc. (he was a government contractor for years). We team up to make a really funny and sometimes argumentative pair. We are both stubborn and believe we’re always right. He wins sometimes, but so do I.
I can’t forget our most important team member, Reese – our newest edition to our family born January 2012. She helps us remember how to keep things safe and up high.
I hope you enjoy the blog and I will try to share as many details as possible. We will try to keep it funny, light, and practical. YOU CAN DO THIS!
